Homemade Gak

Last week in Kindergarten we learned about the 5 Senses; you know, sight, hearing, smelling, tasting and touching. When I was going through my senses file and planning for the week, I came across an e-mail of a recipe for Gak that I had from one of my education classes in college. The recipe contained only two ingredients: Elmer's glue and liquid starch. Since I have a giant jug of liquid starch that I bought for a craft last Winter, I thought Gak could be something fun to make in the classroom for my students to explore different textures when learning about the sense of touch.

Last fall, I made Slime with my own children at home using Borax, Elmer's glue and water so I was expecting a similar substance. The Slime was a huge hit in my house and lasted for months. I finally threw it out because my kids started pulling it apart and it was getting tiny green bits everywhere. I'm not sure if it was falling apart because it was getting tough and old, kind of like how playdough gets crumbly as it dries up, or if they were just pulling it into little bits intentionally. Probably the former.

But back to the Gak, we made it at school and my students LOVED it! It was very sticky and messy though so Gak play is restricted to Center Fun time on the small square table in our classroom kitchen, far away from any rugs.

I know what you're thinking, I'm not doing a very good job of selling "making Gak" to you by talking about what a mess it is. I was actually a little nervous myself about making it here at home, but I knew my son and daughter would love it, which I supposed outweighed the potential mess. They don't make Clorox wipes, stain remover, soap and water for nothing right? Plus I thought my son deserved a break from all the coloring, cutting and thinking he did all day in Kindergarten.

So, when we got home from school today, I got out all of the things we needed to make our very own Gak.

The recipe calls for 1 cup (8oz) of Elmer's glue and 1/2 cup of liquid starch. I assembled the liquid starch, two 4 oz bottles of Elmer's glue, a bowl (for mixing the ingredients), a measuring cup, a spoon, and food coloring.

We started by adding the glue to the bowl. My five year old son and two year old daughter both wanted to help and I had two bottles of glue so I let each child put one bottle of glue into the bowl.

Next we added food coloring to make our Gak more fun. My son originally wanted "red and blue" Gak, but then decided that orange would be more "fall-like" so I put 6 drops of red food coloring and 6 drops of yellow food coloring into the glue. Now, I'm all about having the kids help, but I'm not brave enough to put an open dropper of food coloring in either of their hands. I did however, let my son stir the food coloring into the glue to mix the color.

Next, my daughter and I slowly poured the liquid starch into the glue while my son stirred.

I actually put a little more than a 1/2 cup of liquid starch into the measuring cup because when we mixed it in the classroom I had to add a little more liquid starch because the Gak was too sticky. However, I only wound up using about 1/2 cup. As the mixture is being stirred, you can immediately see it starting to form. As you mix, the glue and liquid starch will form a solid mass. If there is any excess liquid leftover after mixing, just discard it. It's really that simple and took us less than 5 minutes to make.

The texture of the Gak is a mixture between Slime and Silly Putty. My son literally played with the Gak for the entire hour it took to get dinner on the table tonight. So it was a huge hit! He did manage to get it all over his shirt, but after soaking his shirt in a sink of lukewarm water for an hour, most of the Gak could be rubbed right out. I would probably recommend a smock or apron and to keep the Gak away from the carpet. My daughter loved it as well and played for a while, but later moved on to some coloring "homework". She managed to keep her shirt clean so as long as your little one isn't flinging the Gak around you should be fine.


Gak Recipe

  • 1 cup of Elmer's School Glue
  • 1/2 cup of liquid starch
  • food coloring
  • mixing bowl
  • measuring cup
  • spoon or other item for stirring

Directions:

1) Put 1 cup of Elmer's School Glue into the mixing bowl.

2) Add and mix food coloring to the glue to reach your desired shade and color.

3) Slowly add liquid starch to the glue while stirring. Stir until mass is formed.

4) Kneed mixture and discard any excess liquid.

5) Play!

Shape Monster

One of the first math units we teach in Kindergarten is shapes. Most 4-6 year old kiddos readily recognize a circle, square and oval, but sometimes rectangles and triangles can be tricky. We take things nice and slow, introducing each shape with a variety of songs, books and activities. We talk about how many sides and angles each of the four basic shapes contains. As well as what finding shapes in real life everyday items. Then it's time for a little review before moving on to building patterns with shapes.

One of my favorite activities for reviewing shapes is a little book that I downloaded from Hubbardscupboard.org called "Shape Monster".

It's a great book for several reasons. First of all, it has very repetitive text, which is wonderful for emergent and beginning readers. Second of all, it reviews each shape and some color words too with simple, yet effective picture support. After we complete the reading and coloring of the book together, I give each student a cutout of a monster and we glue pictures of the shapes from the book onto the monster's belly. For example, the book says, "Shape Monster, Shape Monster, Munch, Munch, Munch. How about a blue circle for your lunch?" then the students glue the blue circle onto the monster. When we are finished with this activity, the children in my class keep the Shape Monster book in their book boxes to reread on their own. The simple, repetitive text and picture support makes this book easy to memorize and is thus a great candidate for independent reading at the beginning of Kindergarten.

This year, I completed all of my regular Shape Monster activities and I decided that I needed a little something more...so I made my very own Shape Monster for the students in my class to use to act out the story.

Making the Shape Monster was really very simple. All you need is a box with a mouth shaped opening, green paper or paint, and some decorating supplies.

In my case, I used a Simple Human trash bag box, which is very sturdy. You could also use an old tissue box. In Kindergarten, the sturdier the better. I used duck tape to cover my monster, but you could paint the box or cover it in some sort of paper. I was worried that my students would rip paper if I used it and I wasn't sure how paint would cover the different colored surface of the box. Plus, duck tape is pretty sticky and indestructible. The hardest part of covering the box was cutting the tape, but I managed without too much effort.

Then came the decorating. I had originally thought that I would just glue googly eyes and a pom-pom nose on the monster to make the face. Then I decided he didn't look very monster-ish so I added some white construction paper triangle teeth. Then one of my students told me he needed hair, so I curled some ribbon and put it on as well.

I used a hot glue gun to glue his face together, mostly because it dries fast and I knew everything would stick with hot glue. After Shape Monster was put together, I found matching shapes for the story. I had the correct colored square, triangle, and circle in my classroom, but I had to cut an oval and rectangle out of construction paper.


Now, when my students finish up math early, they are eager to work with a buddy to feed the Shape Monster his lunch!


There Was An Old Monster

There Was An Old Monster!
$12.75
By Rebecca Emberley, Adrian Emberley
Buy on Amazon

Recently I was searching the library for one of my favorite Monster stories, Go Away Big Green Monster by Ed Emberley to use when teaching my "Shape Monster" lesson. As I was looking, I came across There Was An Old Monster! by Rebecca Emberley and Adrian Emberley. Now anyone who has been reading my recent posts knows that I have a thing for There Was An Old Lady, so of course I had to check this one out. My son and kindergarten students absolutely LOVED this silly story of a monster eating everything from ants who gave him "ants in his pants" to a lion who made the monster "no more". There's also a fun downloadable song from Scholastic to go along with the story. Your little monster lover will really enjoy this one!

Beautiful B

Before children learn words, they learn the alphabet. Alphabet books, puzzles and games are great ways to work on letter identification, but as students learn what letters look like, it's also important to focus in on the sound each letter makes. Each year I get a new group of cute, eager learners with a variety of academic abilities. There are many different and effective early literacy programs available for teaching letters and their sounds; however, at my school, we've used the "letter of the week" approach with success for many years.

Each fall our Kindergarten team sits down and decides the order to teach the letters. We usually begin with B and work our way around to all 21 consonant, 10 vowel and 3 digraph sounds. We use a blend of theme based teaching and typical letter knowledge progression in our choices. Each week I will feature a new letter (after I've taught it and reviewed it at home) and give you lots of great ideas to teach or review the letter at home or in your classroom. These alphabet posts are great for children who are just being introduced to letters as well as children who may be learning the alphabet in a preschool or Kindergarten program already. (I'm actually planning on using them as a review for my son as we go through the letters of the week at school and as an introduction for my 2-year old daughter as she begins to learn them).

B is so fun to teach! It's at the beginning of the alphabet, it lends itself well to back-to-school, bus, and my favorite-bugs. Many children come to kindergarten already knowing B and the sound it makes. (Although lowercase b's can be tricky to distinguish between lowercase d's.)

1) Make A List of Words That Begin With B: Every Monday morning after calendar, I read an Alpha Tale book from a Scholastic series I bought the first year I started teaching. Then as a class we brainstorm a list of words that begin with the letter of the week. The B book is called Bubble Bear by Maxwell Higgins.

Here's my brainstorm list of words that begin with B:

·      baboon                                      ·      baby                                   ·      back

·      backpack                                   ·      bad                                     ·      badger

·      bag                                             ·      ball                                     ·      balloon

·      baloney                                     ·      Bambi                                 ·      banana

·      Barbie                                       ·      baseball                              ·      basket

·      basketball                                ·      bat                                        ·      baton

·      bean                                         ·      bear                                     ·      beautiful

·      bed                                           ·      bee                                      ·      beetle

·      bell                                           ·      bib                                        ·      bicycle

·      big                                            ·      bike                                      ·      bin

·      bird                                           ·      bit                                         ·      bitter

·      black                                         ·      blue                                     ·      boat

·      bologna                                    ·      boogers                              ·      book

·      bottle                                        ·      bow                                     ·      box

·      boy                                           ·      brave                                   ·      bread

·      bring                                         ·      brown                                  ·      bubbles

·      bug                                           ·      build                                    ·      bumble bee

·      bus                                           ·      butter                                  ·      butterfly

·      button


2) Letter Detective for B: Look through a magazine and hunt for pictures of things that begin with B. (Parenting and home good magazines are great for this!) When you come across a baby or a basket, cut it out and glue it on a sheet of paper. You or your child can label the picture with a corresponding word to make your very own picture dictionary page.

3) Playdough Letter Practice: Playdough is one of my favorite things. It's great for building hand strength and awesome for creating things, even letters. I've seen cookie cutters for the letters, but what I'm really thinking about is manipulating the dough to make the basic forms of the letters. All of the letters can be formed using big straight lines, big curves, little straight lines and little curves. For example, a capital B would be made with one straight line and two little curves so I broke my playdough into one half and two quarters. I rolled a straight snake out of the half chunk of playdough and then made a small curve out of the two quarters. When the pieces are put together they make a capital B.

You can also practice writing Bb's using different tools such as a chalkboard, dry erase board, erasable magnetic board, or steamy shower glass. My son actually loves to show his little sister the "only correct way," as he calls it, to write the letters. If you're not sure about the correct way to form letters use the top to bottom, left to right approach. For example, capital B is a straight line from top to bottom. Then "frog hop" a.k.a. pick up your pencil and go back up to the top and make your little curve to the middle, then little curve to the bottom.

4) Make a B Bag: I love making the letter of the week bag for review at my house each week. It's really fun to walk around thinking of things that can go in the bag. Simply find a small gift bag, if you're like me you might have about 100 or so of these that you've been saving up after each gift giving time to reuse on others. I found a small little striped bag and perused the toys around my house for B items.

Here are the things I found:

a book, a bear, a ball, a block (with a B on it), bubbles, bacon, a butterfly, a bird, blue, brown and black (the buh-markers as my 5 year old called them). I also had a little toy banana, but it somehow disappeared from my bag after I went through the B items with my son and daughter. As your child becomes more advanced in his/her letter knowledge you could also let him/her find their own things for the bag. I'm anticipating that my son will join me for item hunts later this year.

5) Bubble Wrap Painting: This was seriously so much fun. I think all kids are probably like this because when I say the word painting at school, my students get really excited, but my son and daughter LOVE painting. All you need is bubble wrap (we used two different kinds), large paper, and poster paint. I also strongly encourage smocks and newspaper--this was a little-er a lot messy.

I am planning on turning our bubble wrap art into the background of another project that is coming soon.

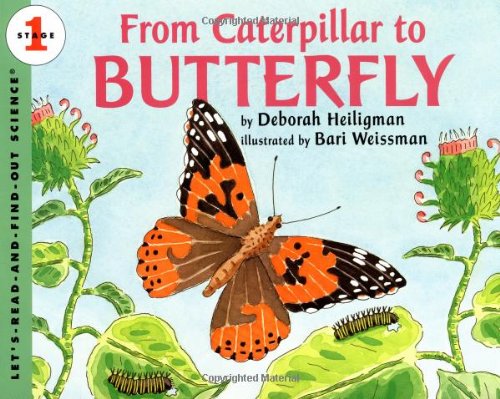
6) Butterfly Life Cycle: Last fall we made cute little butterfly clothespins for B week, but this year we took it a step further and made used paper leaf and twig cut outs, markers, rice and different shaped pasta to make the butterfly life cycle. The rice on the leaf is the caterpillar egg. Next a "rotini" caterpillar emerges and eats the leaf. After the caterpillar becomes bigger, he spins a "shell" chrysalis and is called a pupa. After a couple weeks, the caterpillar comes out of his chrysalis and is a beautiful "bowtie" butterfly.

Monarch caterpillars are also readily available on milkweed in September, so not only did we make our own butterfly life cycle, we are watching it in our classroom. There are also many great fiction and non-fiction books about the butterfly life cycle to read to your little one(s).

7) The Wheels on the Bus: A great way to foster early literacy is simply by singing and reading familiar poems and rhymes with your children. The Wheels on the Bus is a great song that has been adapted and is one of my daughter's favorite songs to sing and act out. Read it in a book and show your child the connection between spoken and written word. Plus all the hand motions are just plain fun!

8) Read a Book with Lots of B's: Here are links to some of my favorite 'B' books.

What do you do to teach and review the letter B?